


Why replace your shock absorbers?
A shock absorber ages with the vehicle. The life expectancy of the shocks depends on the mileage, the driving conditions and the style of driving.
In this article, we explain step-by-step how to change the front shock absorbers of your vehicle.
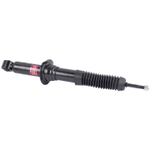
We're working on a Toyota KDJ 95 for the purposes of this article. The shock absorbers on this particular vehicle are almost ten years old and have been driven over 100,000 km. They are clearly worn out so there's no question of waiting any longer. The coil springs however are still in good condition and as the owner doesn't want to change the height of his vehicle we're just going to replace the shock absorbers.
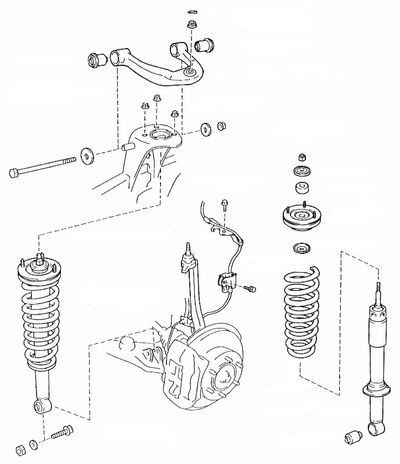
This tutorial is valid for many 4x4 models with a front axle fitted with suspension wishbones.
TOOLS REQUIRED
To change the front shock absorbers of your 4x4, you will need:
. Trolley or bottle jack
. Wheel brace
. Axle stands
. Ratchet wrench + sockets
. Spring compressors + ratchet strap
. Torque wrench
. Crowbar (or similar for leverage)
. Penetrating oil
DIFFICULTY
To give you an idea of the difficulty level of our tutorials, we note them from 1 to 5.
Replacing the front shock absorbers on a 4x4 is a level 2 job.
WORKSHOP
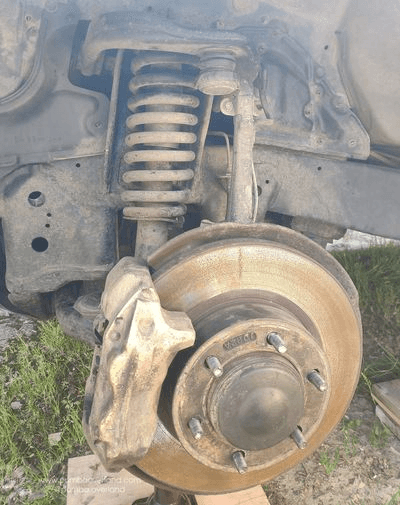
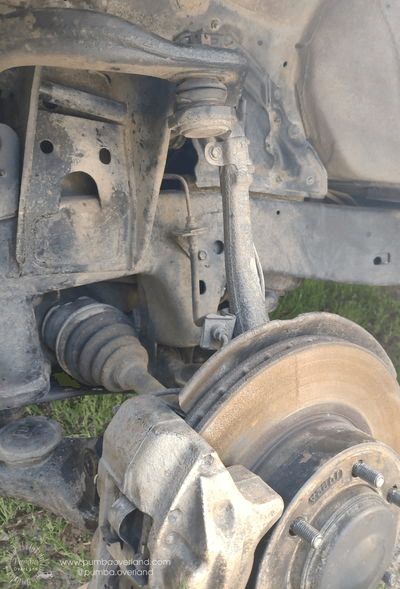
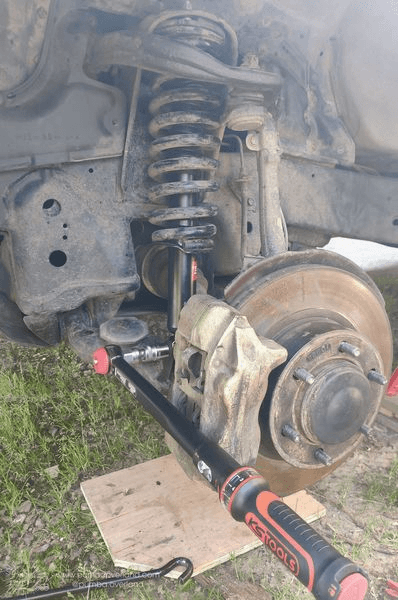
1 - Having jacked up the vehicle and removed the wheel you now have access to the shock absorber. Always use an axle stand for your own safety.
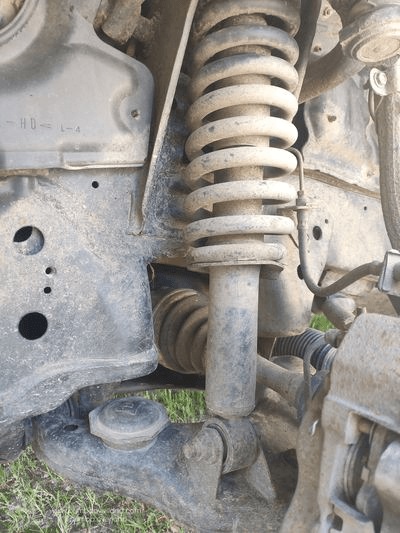
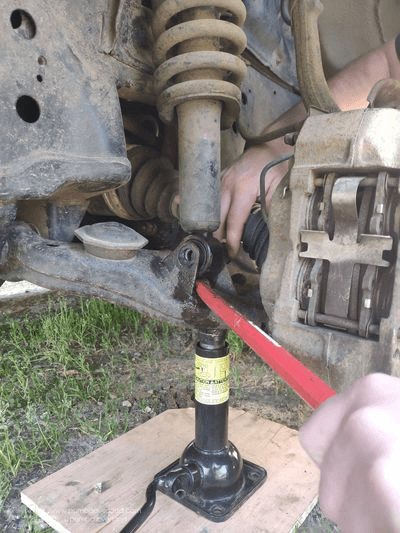
2 - In order to remove the shock/coil assembly you need to release the bolt at the bottom end of the shock absorber. A squirt of penetrating oil at this point will make the job easier.
Now use the crowbar or similar to lever out the end of the shock absorber.
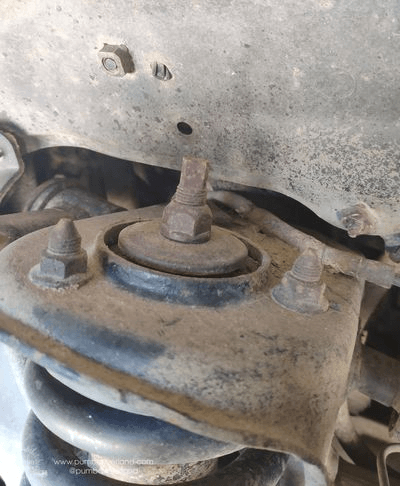
3 - Remove the 3 nuts that hold the assembly to the upper mount. Use penetrating oil if required.
4 - Now the shock absorber / coil assembly is off the 4x4, head over to the bench to continue.
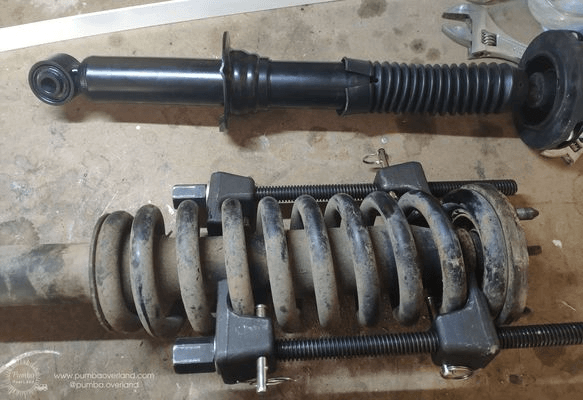
5 - Now it's time to disassemble the reassemble the coil / shock assembly.
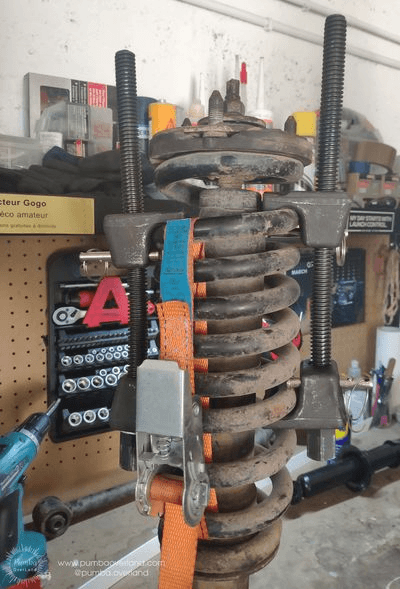
Fit the spring compressors and start to compress the coil. Hold the top end of the shock with a flat spanner as you undo the top nut to separate the shock from the upper cup.
Refitting is just the reverse. However, be sure to pay attention to the alignment of the lower eye and the bushings (the point where the shock is attached to the lower wishbone).
We marked up the alignment of the components before removal, then carried these marks over to the new shock absorber. This way the 3 upper nuts and the lower bolt will all fall into the correct position.
If you haven't done this, don't panic. Just tighten up loosely then adjust when it is on the vehicle.

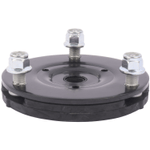
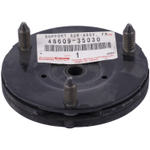
6 - If the bushing are showing signs of wear and tear, now is the time to change them. In the example they were actually not too bad but we decided to change them anyway. Similarly check the upper cup and replace if required.
7 - To refit to the 4x4 it's basically the reverse procedure:
Align the top of the strut assembly into position and fit the 3 top nuts.
Then slide the bottom eye into position and refit the bolt that holds the shock to the lower wishbone. You might need a bar or even a jack to help lever into position.
Finally torque up the bolts as follows:
Shock absorber top nut : 25Nm
3 top mount nuts: 64 Nm
Lower eye bolt: 135Nm
Now just repeat the procedure on the other side of the 4x4.
PARTS
Choose the front shock absorbers for your 4x4:
Article by Alix & Gauthier - blog.pumbaoverland.com
Please note: Euro4x4Parts publishes this information to help its customers but cannot be held responsible for the advice given here and practical consequences therin.
Do it yourself, you'll be even prouder! To help you out, Euro4x4parts shares its know-how and expertise in mechanics through 4X4XPERT: new products, technical sheets, and personalized tutorials... You've got the keys!
And because we also learn from your experiences, your feedback is essential. Let us know your thoughts and suggestions by email: 4x4xpert@euro4x4parts.com
Check out our complete catalogue of 4x4 parts and accessories!
All the photos in our articles are taken on authorized roads or tracks, private land, or during supervised competitions. Let's all do our part to preserve the environment!
Please note: Euro4x4parts publishes this information to help its customers, but cannot be held responsible for the advice given here and their consequences when used.