


TOOLS
- 13mm flat ring spanner
- Flat-blade screwdriver
- Ratchet spanner with 10 & 12mm sockets
- Torx screwdriver
- White marker pen
- Adhesive tape
- Rivet gun
- metalworker's compass
- drill + stepped bit
- pneumatic cutter
- anti-rust treatment
DIFFICULTY
To give you an idea of the difficulty level of our tutorials, we rate them from 1 to 5. This job is level 3.
WORKSHOP
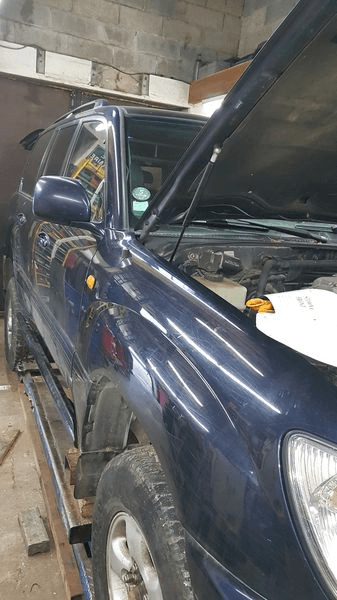
The bonnet is up and the 4x4 is ready for us to get to work on fitting the snorkel.

Lay the template out in position along the front right wing as per the instructions (supplied with the snorkel). Fix it in place with the adhesive tape.
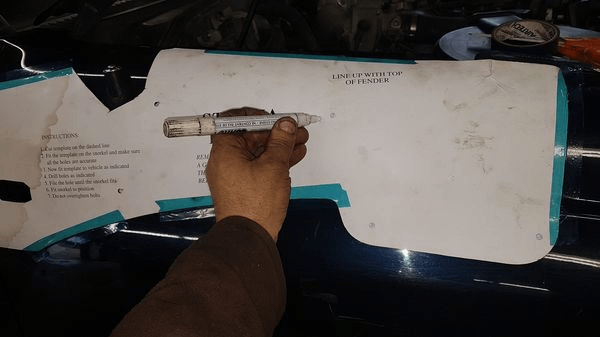
Mark up the drill holes with the white marker pen, then remove the template.
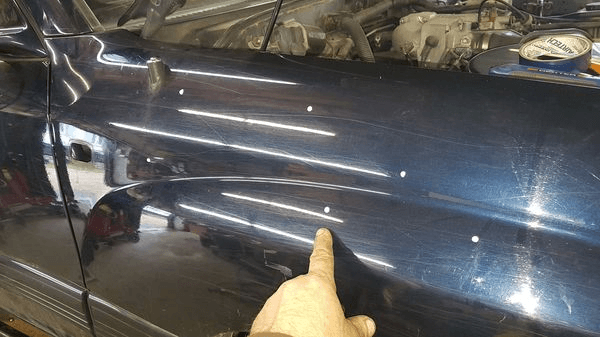
Now the drill holes are all marked out, all that remains is to drill and cut the wing. This can seem quite daunting!
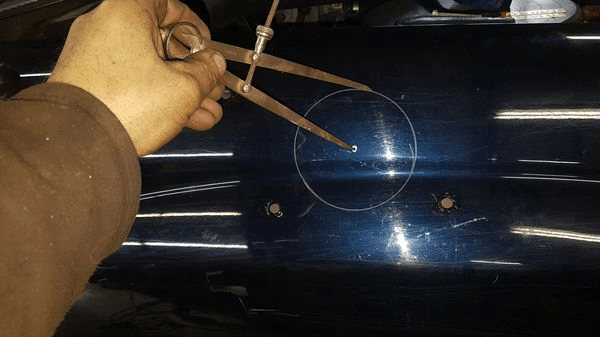
Use the compass to mark out where the hole needs to be to connect the snorkel through the wing.
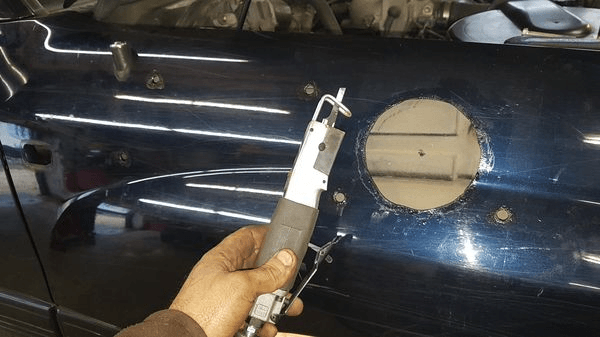
Use the pneumatic cutter to cut out the hole. Alternatively, you can drill out a series of holes then cut out with a small angle grinder.
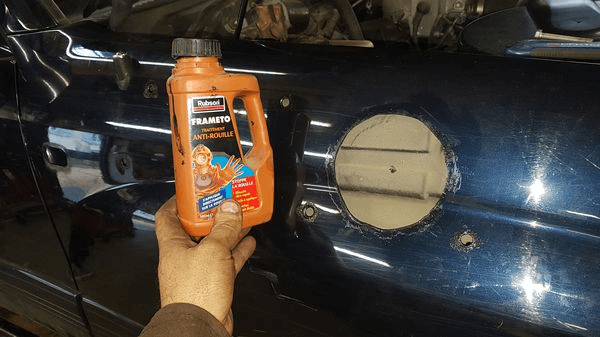
Apply anti-rust treatment to the drilled holes and the main hole to prevent corrosion over time.
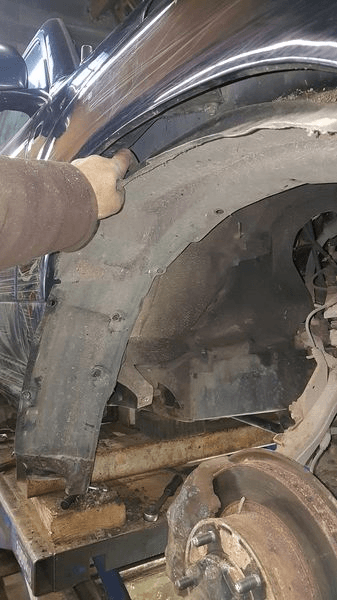
Remove the inner wheel arch protection.
TIP: Best have some new clips to hand because they can easily break when dismantling.
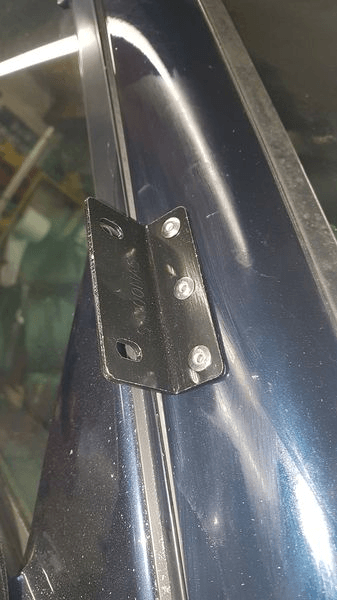
Mark up, drill out and attach the bracket to the right hand 'A' pillar.
Don't forget to apply anti-rust treatment to the holes!
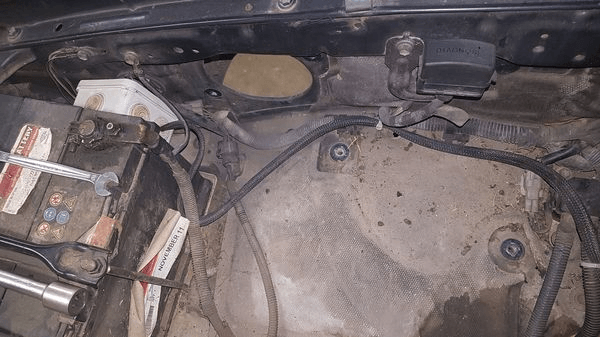
Maks some space for the snorkel around the inner wing.
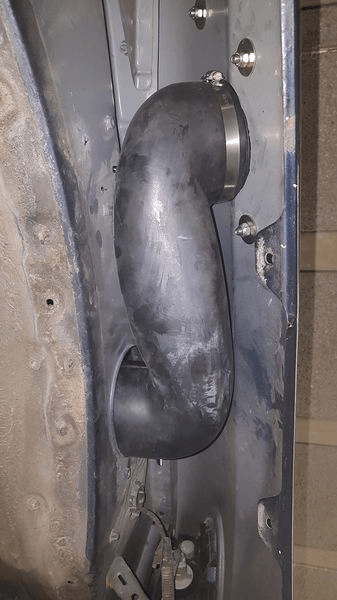
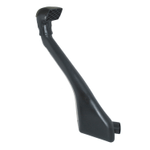
Fit the hose between the snorkel and the airbox, attach the snorkel to the outside of the wing as per the instructions, then refit the inner wheel arch protection.
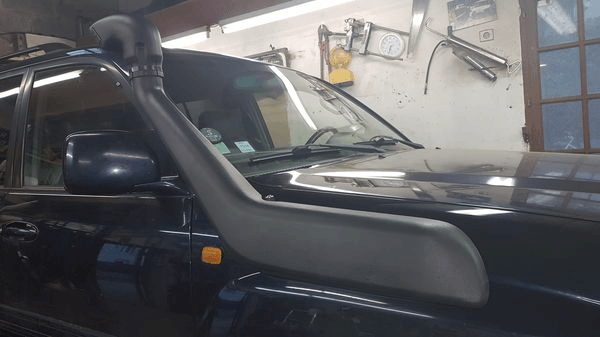
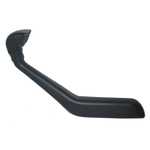
Job done! This particular client decided to have the snorkel head facing backwards.
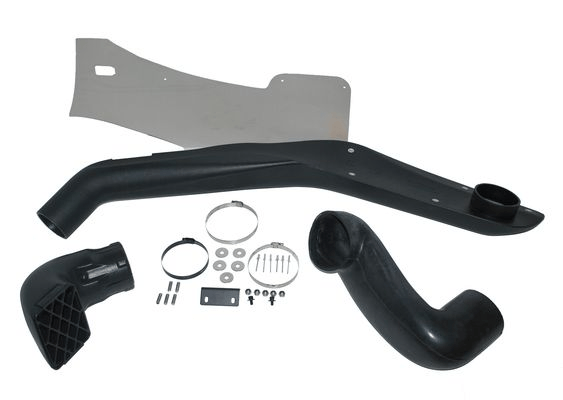
PARTS
Don't have a 100 series Land Cruiser? No worries.
Choose the right snorkel for your 4x4 from our massive range:
EQUIP'ADDICT SNORKELS
Credits: thanks to the Association Sportive Mantaise - blog.asm4x4.com
Please note: Euro4x4Parts publishes this information to help its customers but cannot be held responsible for the advice given here and practical consequences therin.
We'd love to know what you think!
Whether it’s a mechanical question, a suggestion for an article or a comment on an article you have just read - don't hesitate to send us a message.
Do it yourself, you'll be even prouder! To help you out, Euro4x4parts shares its know-how and expertise in mechanics through 4X4XPERT: new products, technical sheets, and personalized tutorials... You've got the keys!
And because we also learn from your experiences, your feedback is essential. Let us know your thoughts and suggestions by email: 4x4xpert@euro4x4parts.com
Check out our complete catalogue of 4x4 parts and accessories!
All the photos in our articles are taken on authorized roads or tracks, private land, or during supervised competitions. Let's all do our part to preserve the environment!
Please note: Euro4x4parts publishes this information to help its customers, but cannot be held responsible for the advice given here and their consequences when used.