


What is a tubeless tyre?
The tubeless tire is one of the most common types of tyre. Unlike pneumatic tyres which use an inner tube, tubeless tires have continuous ribs molded into the bead of the tyre so that they are forced by the pressure of the air inside the tyre to seal with the flanges of the wheel rim making it more compact and more resistant.
Why repair your own tyre?
There's always a sinking feeling when you hear that certain PFFFFT sound coming from one of your tyres when you're out in the wild.
Even more so when you've already used your spare wheel and haven't had time to repair the previous puncture.
However, so long as you have one of our tyre repair kits on board you'll be back on track in minutes.
In this article, we explain step-by-step how to repair a puncture on a tubeless tire in your vehicle.
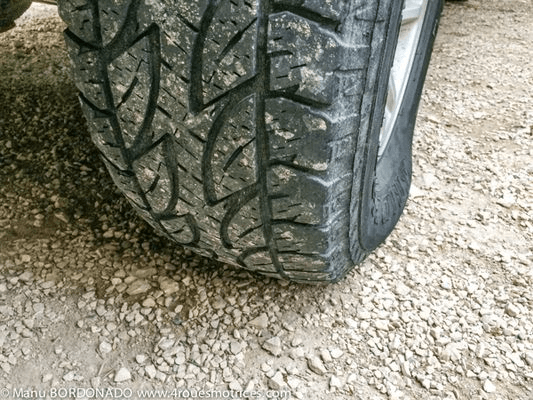
This method applies to all tubeless tyres. The only condition: these repairs can only be done on the tread and not on the sidewalls.
Please note: This is only a temporary repair for when you are out in the field. You still need to make a permanent repair later.
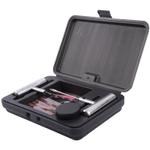
Tools
To repair a tubeless tyre on your 4x4 you just need the following:
- Tubeless tyre repair kit
- Pliers or screwdriver
- Brush
- Compressor
- Gloves
Difficulty
To give you an idea of the degree of difficulty in our tutorials we give them a note of 1 (easy) to 5. Repairing a tubeless tyre on your 4x4 is a level 1 job.
WORKSHOP
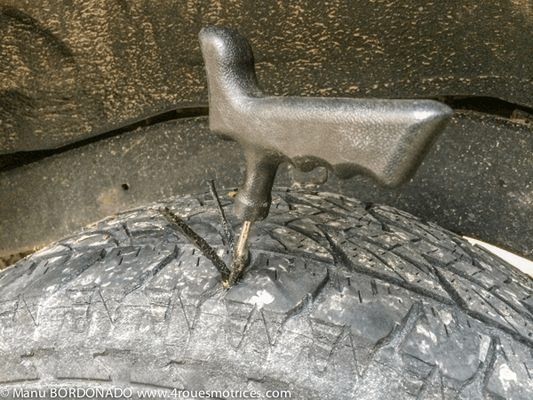
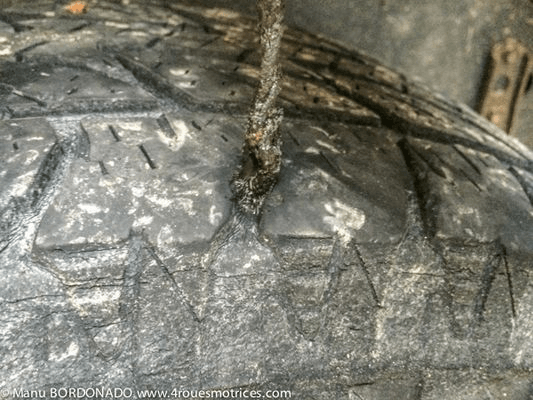
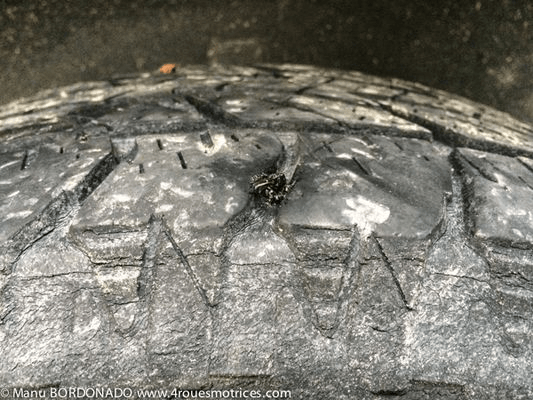
1 - First step is to find out where the air is leaking from or spot the culprit that is embedded in the tyre. If necessary pump up the tyre and listen for the leak.

2 - You'll soon spot the culprit - perhaps anail or screw embedded in the tread.
3 - You now need to pull out the object as best you can using pliers or or a screwdriver.
As soon as you have removed the offending object the tyre will suddenly go completely flat - don't panic, that's perfectly normal!
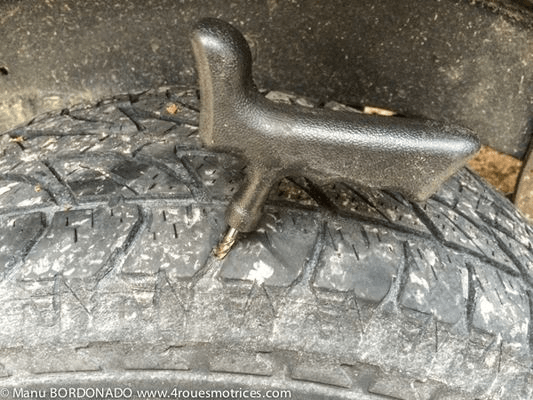
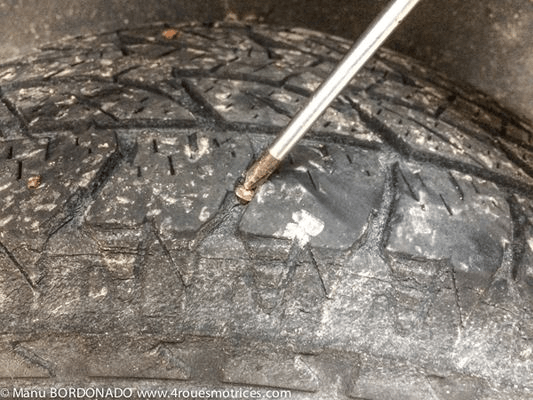
4 - Now you need to prepare the hole ready for repair. Using the tool that looks like a corkscrew supplied in the kit. Push it into the tyre whilst turning it (just as you would with a wine bottle) then pull it out whilst turning in the opposite direction.
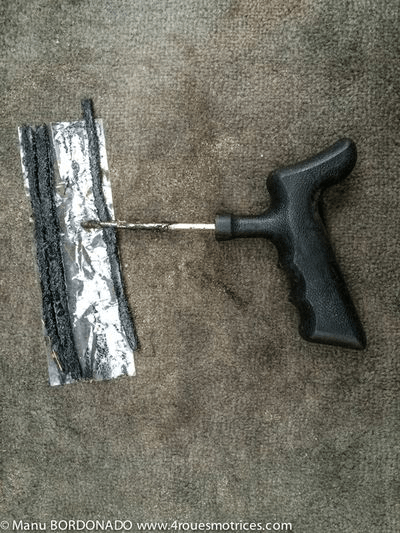
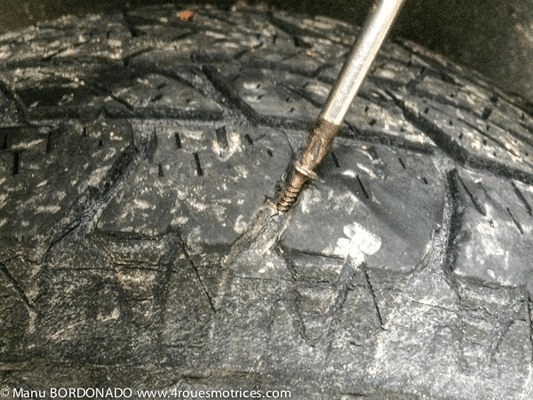
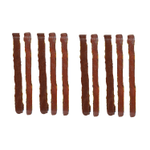
5 - Slide the sticky, auto-vulcanizing strip through the eye of the needle on the puller tool.
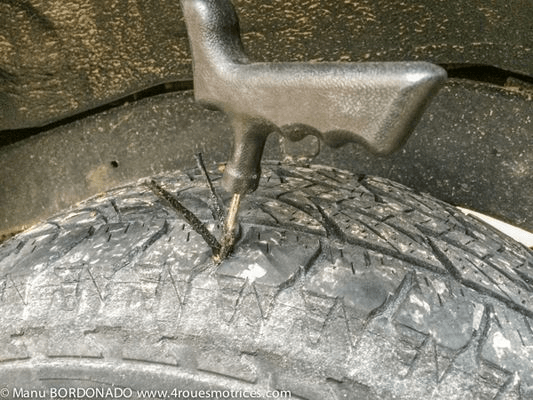
6 - Then, push the needle into the tyre fairly deeply clockwise. And so that the strip disappears by half or two-thirds.
Then remove the needle by turning it counterclockwise. Normally the strip will stay in the tyre, but sometimes it can stick to the needle and comes out. It doesn't matter, just try again.
Tip: These strips are generally relatively long. If you are out in the middle of nowhere and you're running out of these strips you can cut one in half - it will still work.
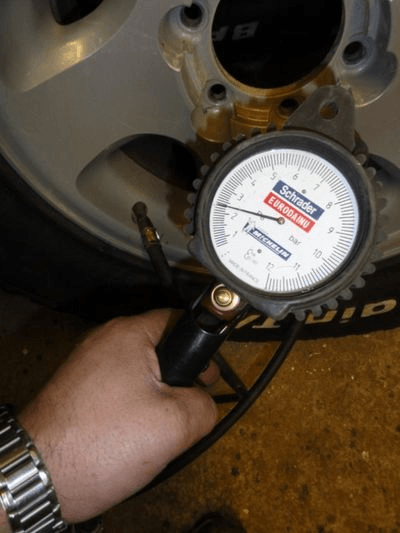
7 - Wait a few minutes then inflate the tyre to the required pressure.
8 - Trim off the surplus strip with the knife supplied in the kit.
9 - Job done! Just put the wheel back on (if you removed it) and you're back on the road.
PARTS
Our range of compressors, pressure gauges and valves
Credits: article by Manu Bordonado blog.4rouesmotrices.com
Please note : Euro4x4Parts publishes this information to help its customers but cannot be held responsible for the advice given here and practical consequences therin.
Do it yourself, you'll be even prouder! To help you out, Euro4x4parts shares its know-how and expertise in mechanics through 4X4XPERT: new products, technical sheets, and personalized tutorials... You've got the keys!
And because we also learn from your experiences, your feedback is essential. Let us know your thoughts and suggestions by email: 4x4xpert@euro4x4parts.com
Check out our complete catalogue of 4x4 parts and accessories!
All the photos in our articles are taken on authorized roads or tracks, private land, or during supervised competitions. Let's all do our part to preserve the environment!
Please note: Euro4x4parts publishes this information to help its customers, but cannot be held responsible for the advice given here and their consequences when used.