


Why change the glow plugs?
Like many car parts, glow plugs have to be changed after a certain time or they risk causing damage. Some of the signs that it’s time to change them are:
Difficult or even impossible starting depending on the state of wear
Excessive fuel consumption and engine problems (for “post-heating” type glow plugs in particular)
Discharge of polluting particles, a common reason for failing the MOT.
Generally, their service life is about 120,000 km. However, this can depend on several factors such as the brand, the frequency with which the vehicle is started or even weather conditions.
Even if only one glow plug is faulty, it is important to change all the glow plugs at the same time, in order to avoid an imbalance between the cylinders when you start your 4x4.
In this article, we explain step by step how to change the glow plugs of your vehicle.
We are changing the glow plugs on a Nissan Patrol Y61.
This tutorial is valid for a number of 4x4 models.

Tools
To change the glow plugs on your 4x4, you’ll need:
- 8 & 10mm spanners
- 12mm pipe spanner
- 12mm box spanner
- Flat screwdriver
- Adjustable spanner
DIFFICULTY LEVEL
To give you an idea of the level of difficulty of our tutorials, we have rated them from 1 to 5.
Changing the glows plugs on a 4x4 is a level 2 job.
Workshop
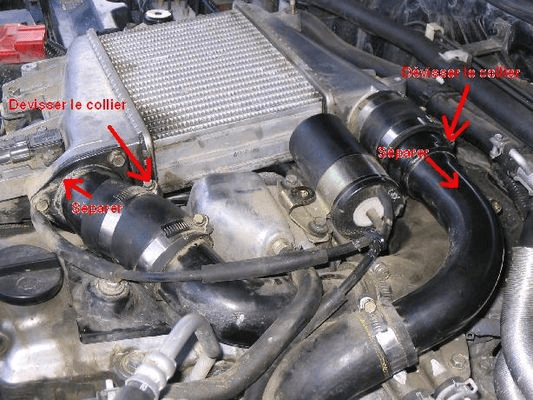
1 - After removing the plastic cover, remove the intercooler by simply loosening the 2 clamps and removing the 4 bolts from the exchanger.
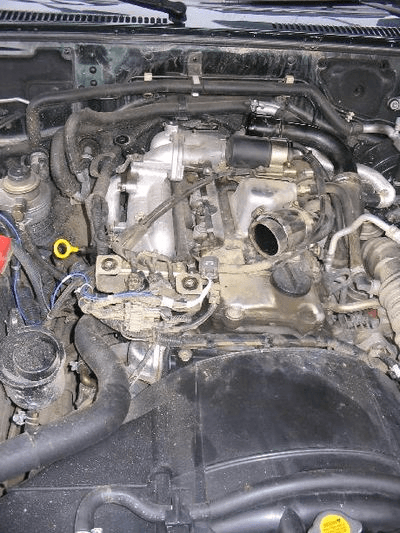
2 - This is what it looks like.
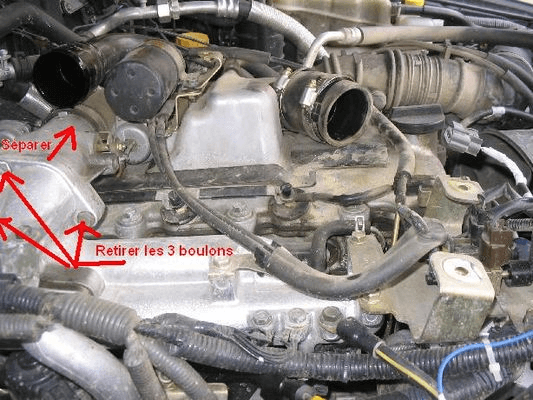
3 - To gain access to the 2 glow plugs located near the firewall, the air intake must be removed. To do this, remove the 3 bolts as in the photo above. Be careful not to damage the seal when removing the air intake.
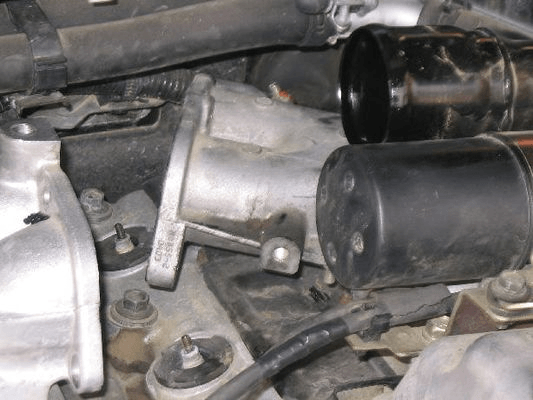
4 - Now we have access to the 2 glow plugs.
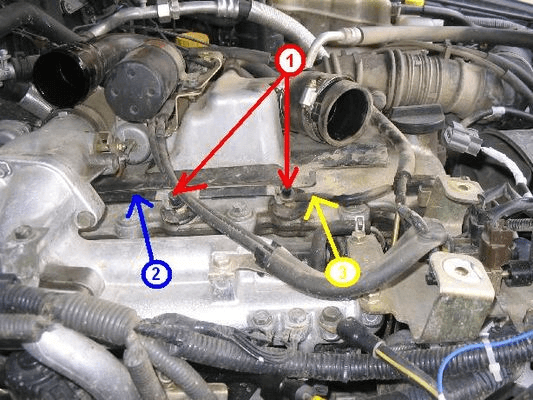
5 - Perform these steps in order:
1: remove the 4 bakelite nuts
2: remove the metal strip serving as a conductor
3: do not forget to reconnect this wire when reassembling
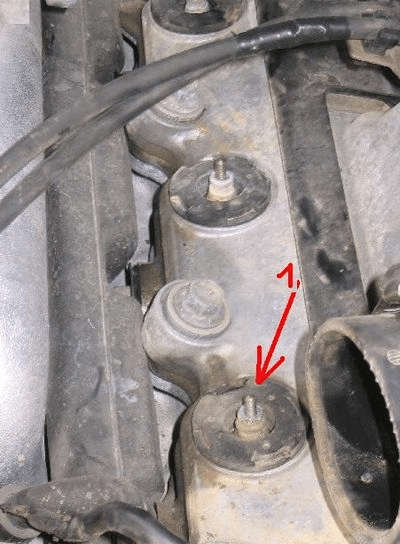
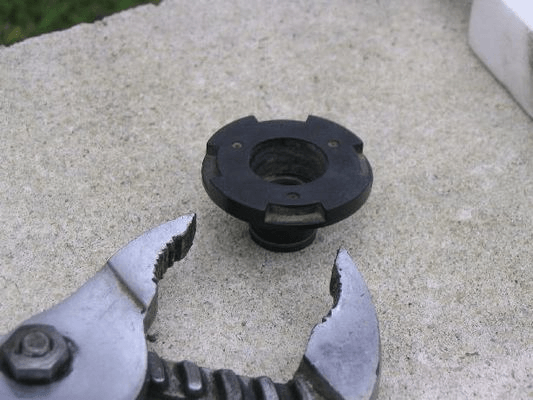
6 - Remove the Bakelite cover which acts as a seal (1 in the photo above), use the pliers.
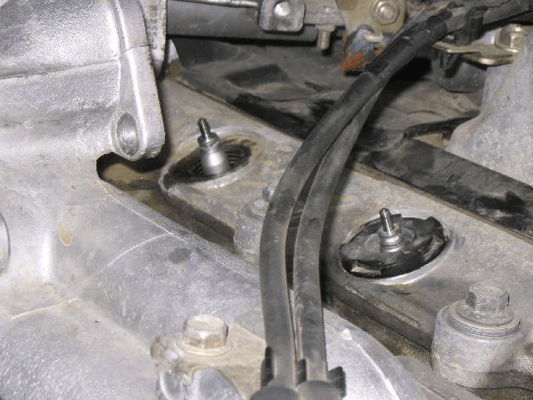
7 - Using the 12mm pipe spanner, remove the first glow plug. You can use a flat spanner (for example 18mm) to lever it out if necessary.
Put the new glow plug in, be careful, it's fragile. Then the bakelite protection.
Repeat the same operation for the other 3 plugs.
8 - When you have replaced the 4 glow plugs, put back the metal strip serving as a conductor, the power wire and the bakelite nuts. Then reassemble the remaining parts and finish by putting the plastic cover back on.
Parts
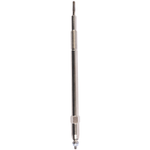
Find the glow plugs to suit your vehicle :
Contribute to Mécazine!

Euro4x4parts has more than a hundred mechanical tutorials in its Mecazine, our aim is to encourage and help you with the maintenance and repairs of your 4x4. These tutorials, illustrated by photos and videos, are not only created by us. Many customers love to share their knowledge and experiences with us. You too can contribute.
Do it yourself, you'll be even prouder! To help you out, Euro4x4parts shares its know-how and expertise in mechanics through 4X4XPERT: new products, technical sheets, and personalized tutorials... You've got the keys!
And because we also learn from your experiences, your feedback is essential. Let us know your thoughts and suggestions by email: 4x4xpert@euro4x4parts.com
Check out our complete catalogue of 4x4 parts and accessories!
All the photos in our articles are taken on authorized roads or tracks, private land, or during supervised competitions. Let's all do our part to preserve the environment!
Please note: Euro4x4parts publishes this information to help its customers, but cannot be held responsible for the advice given here and their consequences when used.