


Check out our video tutorials on our YouTube channel:
https://www.youtube.com/user/euro4x4parts
These videos are produced in-house Anthony, Michel and Jun and will give you a better view of the types of jobs we cover in our Mecazine.
In this edition we take you through changing the front discs and pads on your 4x4.
Grab your tools!
TOOLS
. Ramp or jack + axle stands
. Wheel brace
. Ratchet spanner + sockets 13 and 19
. Phillips screwdriver
. Flat-head screwdriver
. Hammer
. Pliers
. Wire brush
. Crowbar (for leverage)
. Penetrating oil
. Grease
. Sandpaper
DIFFICULTY
To give you an idea of the difficulty level of our tutorials, we note them from 1 to 5.
This one is level 3.
WORKSHOP
DISASSEMBLY
1 - Undo the wheel nuts then remove the wheel.
2 - Check for the amount of wear on the brake disc.
3 - Slowly push back the piston by putting a screwdriver between the caliper and the brake disc, then between the brake pad and the piston. This makes it easier to put the brake caliper back into place with the new brake pads.
4 - Undo the 2 bolts holding the brake caliper, remove the brake caliper and remove the brake pads.
5 - Remove the two bolts from the caliper support bracket.
6 - Use the wire brush to remove as much rust as possible, and apply some penetrating oil to make it easier to remove the brake disc.
7 - Remove the small O-ring which on the hub, which is used to hold the disc.
8 - Use a lever to extract the brake disc then remove.
9 - Use the brush again to clean the base of the hub so that the brake disc seats correctly.
CHECK
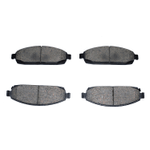
10 - Compare the new parts with the old ones: the shape of the pads, the width and the length.
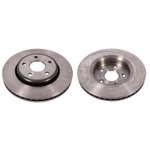
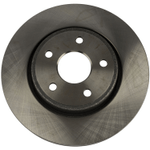
11 - For brake discs, check the number of holes, the outside diameter of the disc and the diameter of the hub.
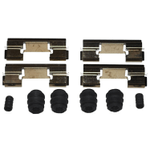
12 - Before reassembly, replace the anti-rattle shims and the dust covers on the caliper slider pins if necessary.
13 - Start by removing the shims, then remove the sliders from the support, then dust covers.
14 - Always take time to compare new parts with old ones.
15 - Clean the parts by degreasing them.
REASSEMBLY
16 - Grease the pins.
17 - Refit the new seals on the pins.
18 - Clean and grease the pin holes then remove the excess grease with a cloth.
19 - Put the pins and the dust covers back on the support. Re-fit the anti-rattle shims.
20 - Fit the brake disc and don't forget that small O-ring.
21 - Refit the caliper bracket, then tighten the two bolts.
22 - Refit the brake pads - make sure the wear indicators are facing in.
23 - To reassemble the brake caliper, push back the two pistons if necessary.
24 - Refit the brake caliper, making sure that the two flattened part of the pins are in the correct position, the tighten the bolts.
25 - Put the wheel back on tighten the wheel nuts.
IMPORTANT: BEFORE MOVING YOUR VEHICLE, YOU MUST PUMP THE BRAKE PEDAL REPEATEDLY UNTIL THE PEDAL FEELS HARD
PARTS

Video produced in-house by Anthony, Michel and Jun
Please note: Euro4x4Parts publishes this information to help its customers but cannot be held responsible for the advice given here and practical consequences therin.
We'd love to know what you think.
Whether it’s a mechanical question, a suggestion for an article or a comment on an article you have just read - feel free to send us a message.
Do it yourself, you'll be even prouder! To help you out, Euro4x4parts shares its know-how and expertise in mechanics through 4X4XPERT: new products, technical sheets, and personalized tutorials... You've got the keys!
And because we also learn from your experiences, your feedback is essential. Let us know your thoughts and suggestions by email: 4x4xpert@euro4x4parts.com
Check out our complete catalogue of 4x4 parts and accessories!
All the photos in our articles are taken on authorized roads or tracks, private land, or during supervised competitions. Let's all do our part to preserve the environment!
Please note: Euro4x4parts publishes this information to help its customers, but cannot be held responsible for the advice given here and their consequences when used.