


What is an oil seal?
Commonly used in the automotive field, this type of seal is also known as a "lip seal" or "rotary seal". It is designed to be used in rotating parts such as crankshafts, camshafts, wheels, etc ... The primary function is to keep lubrication fluids in, whilst preventing the ingress of contaminants, such as mud and water
This type of seal is made up of an elastomer body and is reinforced by a metal ring. It is placed in a fixed housing where the sealing lip is in contact with the rotating element. The lip features a spring to ensure a perfect seal.
Why replace an oil seal?
So you've checked under your 4x4 and you've spotted the start of a small leak?It's time to replace that tired oil seal. This is much easier to do in the comfort of your garage or driveway than when you're out in the wild!
A defective oil seal automatically causes oil loss from axles, gearboxes or the engine. This is therefore strongly to be avoided.
In this article, we explain step-by-step how to easily replace a differential oil seal on your 4x4.
We're working on the front differential of a Toyota Land Cruiser 100 series for this oil seal replacement tutorial.
The basics steps to replace the oil seal are identical for the rear axle of this vehicle and on many other 4x4 models.
TOOLS
To replace a differential oil seal on your 4x4, you'll need:
. 2 14mm spanners
. Ratchet wrench + extension
. 30mm socket (be careful, size can vary according on certain models)
. Big screwdriver
. Hammer
. Chisel
. Oil catch pan
DIFFICULTY
To give you an idea of the difficulty level of our tutorials, we note them from 1 to 5. The differential oil seal replacement is a level 1 job.
WORKSHOP
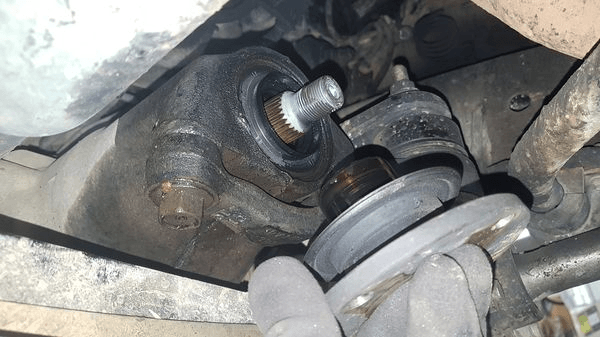
1 - First job is to remove the front propeller shaft from the differential pinion flange. Use the two 14mm spanners to under the 4 bolts.
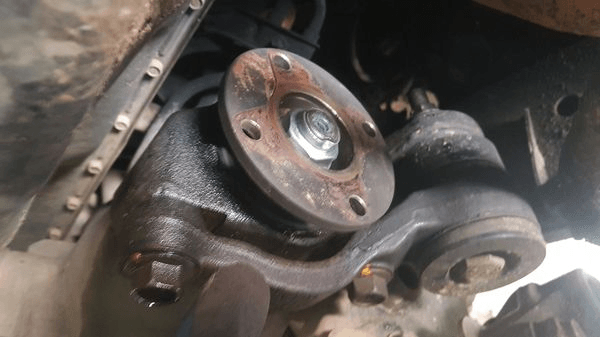
You now have access to the pinion flange.
You don't need to drain the front differential for this job. Just use a catch pan to recover the few cm3 of oil that will drip out.
Do not forget to mark the position of the propeller shaft on the flange to reposition it in exactly the same place during reassembly.
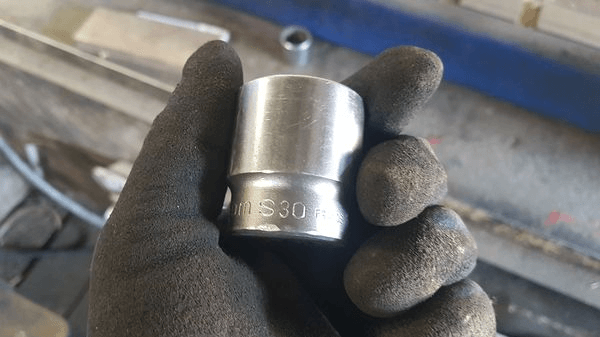
2 - The 30mm socket is required to remove the flange nut.
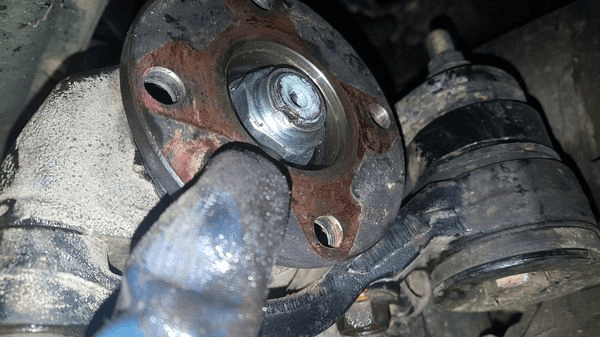
3 - The leak from the differential pinion oil seal can be clearly seen.

4 - The pinion nut can be stubborn so you may need an extension on the socket spanner to give you more force.
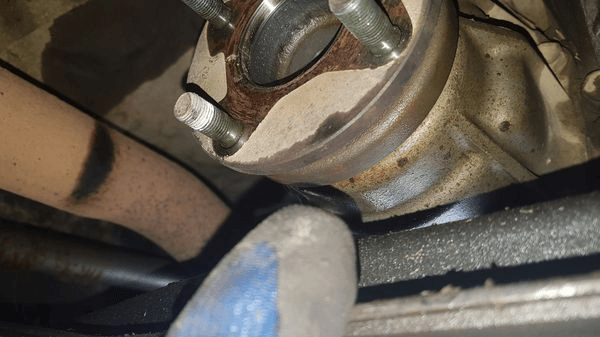
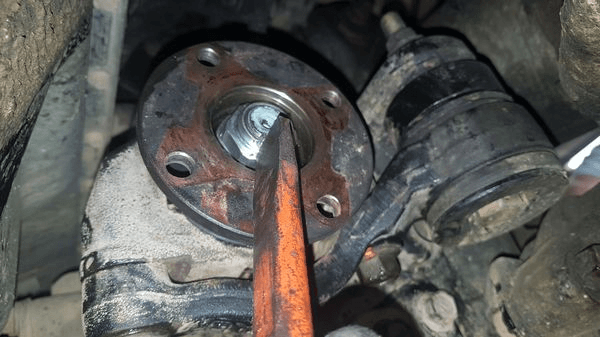
5 - The flange should come off in your hand. If not use a screwdriver to gently lever it off.
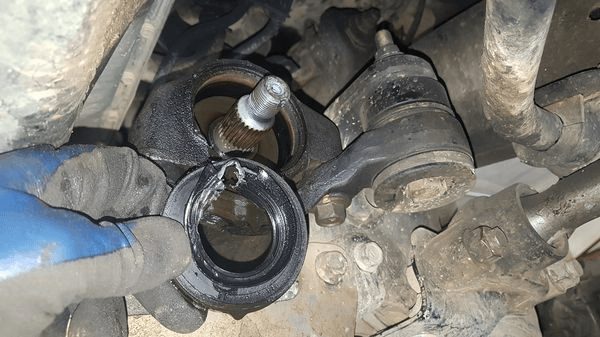
6 - Use the screwdriver to extract the oil seal out of the housing.

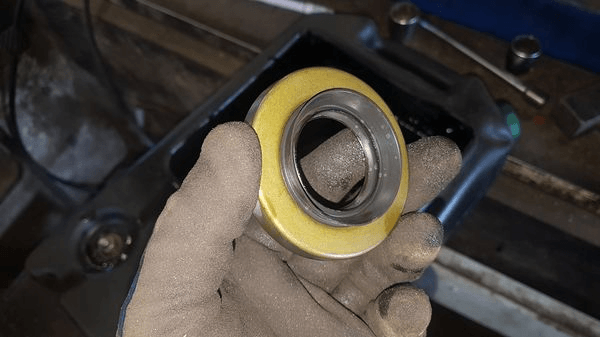
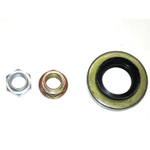
7 - Here's the brand new oil seal.
A new pinion nut is also included in our kit.
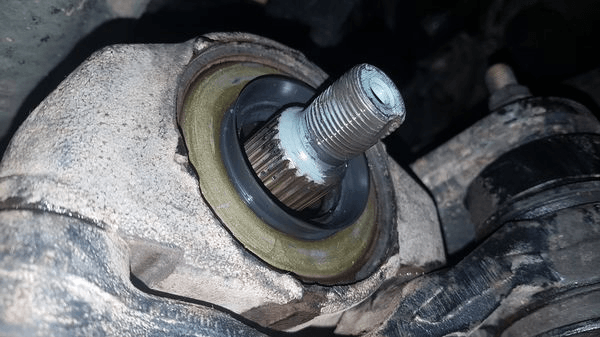
8 - Use the hammer and the old seal to gently tap the new oil seal into position.
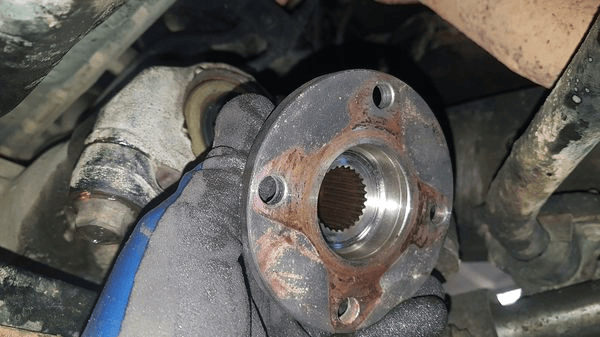
9 - Now slide the flange back onto the pinion splines.
10 - Refit and tighten the pinion nut. Make sure there is no play on the input bearing.
11 - Now use the chisel to "stake" or dent the nut in line with the indent on the pinion shaft to ensure that it can't work loose.
All that remains is to refit the propeller shaft into position and tighten up the 4 bolts.
PARTS

Choose the correct differential oil seal for your 4x4:
Credits: thanks to Association Sportive Mantaise - blog.asm4x4.com
Please note: Euro4x4Parts publishes this information to help its customers but cannot be held responsible for the advice given here and practical consequences therin.
Do it yourself, you'll be even prouder! To help you out, Euro4x4parts shares its know-how and expertise in mechanics through 4X4XPERT: new products, technical sheets, and personalized tutorials... You've got the keys!
And because we also learn from your experiences, your feedback is essential. Let us know your thoughts and suggestions by email: 4x4xpert@euro4x4parts.com
Check out our complete catalogue of 4x4 parts and accessories!
All the photos in our articles are taken on authorized roads or tracks, private land, or during supervised competitions. Let's all do our part to preserve the environment!
Please note: Euro4x4parts publishes this information to help its customers, but cannot be held responsible for the advice given here and their consequences when used.