


In this article, we will show you step-by-step how easy it is to change the diesel filter in your vehicle yourself and save money.
Why change the fuel filter? The diesel filter removes particles from the fuel but also filters outs the water in the diesel. The mechanical injection pump, which equips all diesel engines, is a very fragile part. Poor filtering can lead to serious mechanical and financial consequences! If the filter is neglected, this can damage expensive parts further into the fuel circuit. To preserve the diesel pump, it is therefore essential to regularly change the diesel filter in your vehicle.
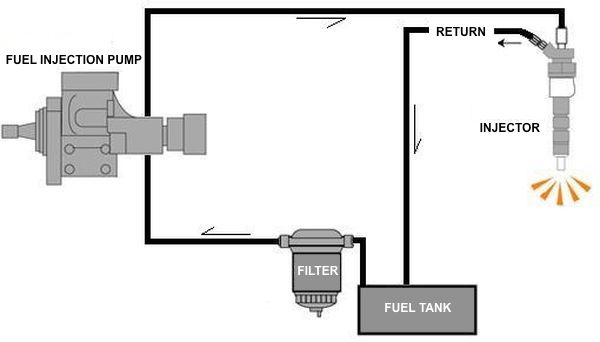
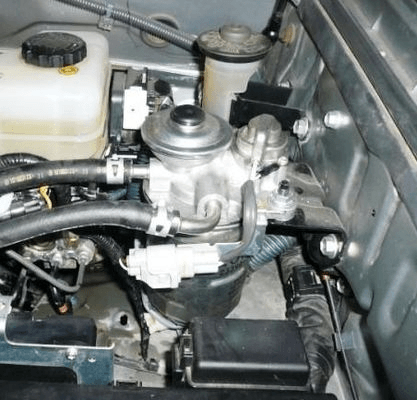
We are using a Toyota KDJ90 as an example for this article. On this model, the fuel filter is located inside the front wing and is particularly easily accessible.
The steps covered in this tutorial are basically the same for every 4x4, the only difference being the location of the filter.
TOOLS
- Flat-head and cruciform screwdrivers
- Flat pliers
- Adjustable grips (pliers)
- Pipe spanners (as required: 12, 13 or 14)
- Filter removal tool (chain or band)
- Pair of gloves
- Paper towels or old rag
- Container and length of tubing
DIFFICULTY
To give you an idea of the difficulty level of our tutorials, we note them from 1 to 5.
This one is level 1.
WORKSHOP
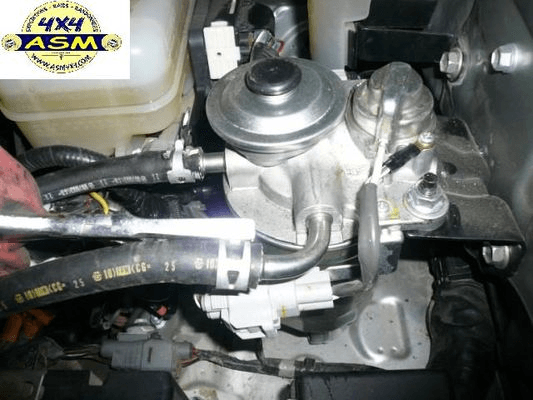
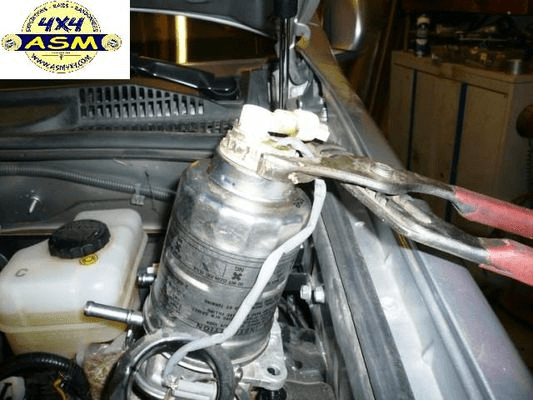
1 - Use the pliers to remove the clips that hold the inlet & outlet hoses to the fuel filter mount. Be sure to note which hose is which. If refitted the wrong way round you will be unable to prime the fuel system.
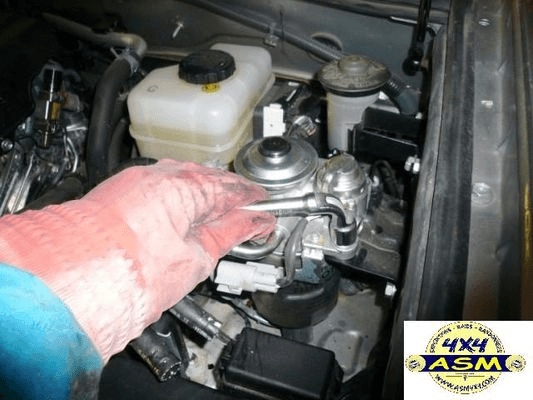
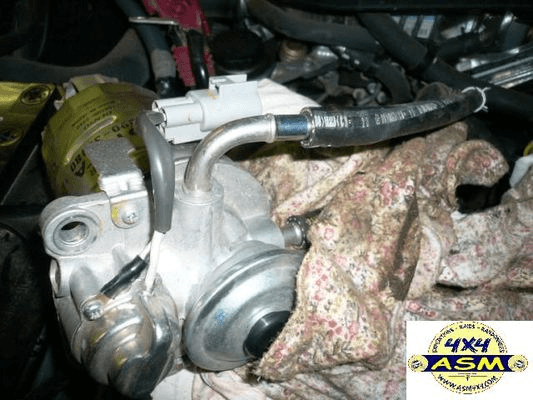
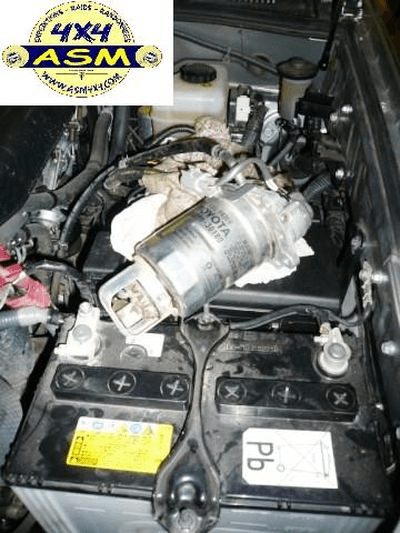
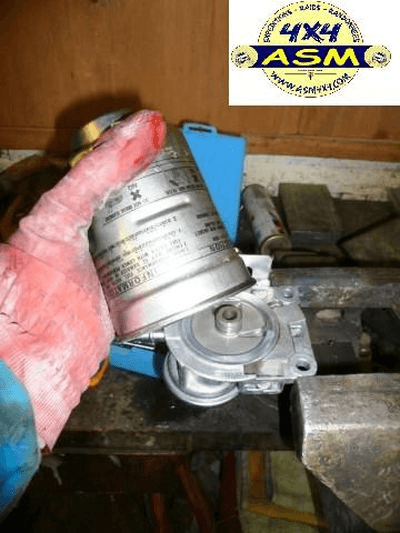
2 - Use the pipe spanners to release & remove the complete filter mount / filter assembly. Remove the pipe from the filter. Use the paper towels or a rag to clean up any spillage. Disconnect the electrical sensor.
3 - Use the adjustable grips to unscrew & remove the water sensor.
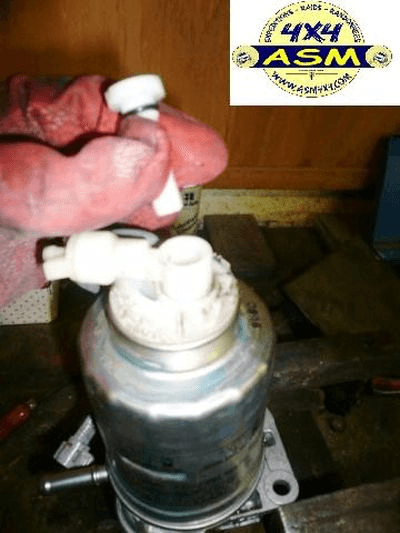
4 - Remove the drain plug and pour out the diesel into the container.
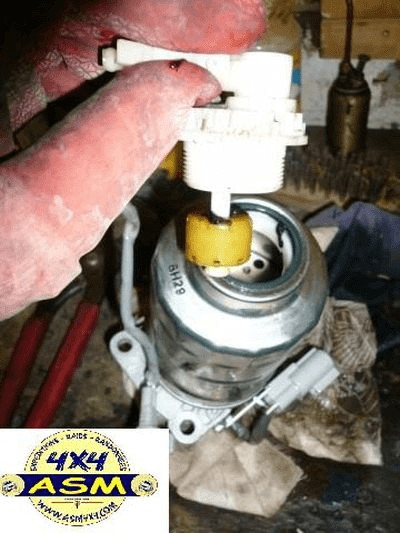
5 - Remove the rest of the sensor. You will probably notice some black deposits as in the photo.
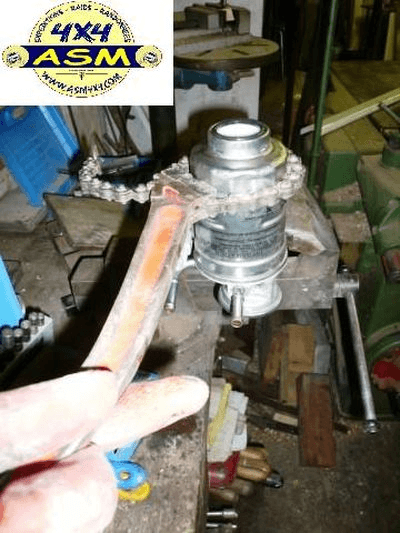
6 - Use the filter removal tool to release then remove the filter from the mount.

7 - Fit the new filter, the rub some fresh diesel onto the rubber seal and fit. The filter only needs to be screwed hand tight onto the mount.
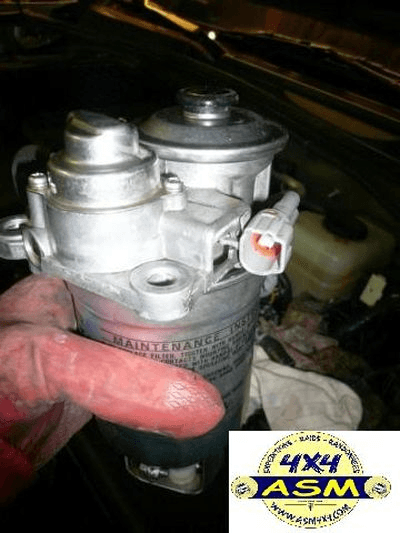
8 - The new filter is now in place and the water sensor has been refitted.
All that remains is to screw the mount + filter assembly back into place and refit the inlet hose.
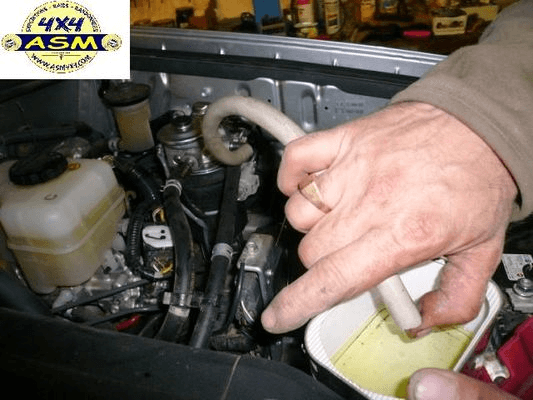
9 - Here's a tip to speed up priming the fuel. Connect your short piece of hose temporarily to the outlet, have the container ready to catch the fuel, then pump repeatedly on the primer on top of the mount whilst keeping your thumb over the end of the hose. This will chase out the air from the system. When primed, refit the outlet hose and all the clips as before. Don't forget to reconnect the sensor plug.
10 - Job done! Now you can start up the engine. It might stutter slightly to start of with if there is any air left in the system but not to worry, this is perfectly normal.
PARTS
Fuel filter examples:
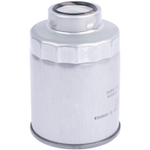
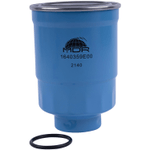
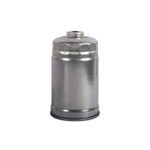
Choose the right diesel fuel filter for your 4x4:
Thanks to Association Sportive Mantaise - blog.asm4x4.com
Please note: Euro4x4Parts publishes this information to help its customers but cannot be held responsible for the advice given here and practical consequences therin.
We'd love to know what you think.
Whether it’s a mechanical question, a suggestion for an article or a comment on an article you have just read - feel free to send us a message.
Do it yourself, you'll be even prouder! To help you out, Euro4x4parts shares its know-how and expertise in mechanics through 4X4XPERT: new products, technical sheets, and personalized tutorials... You've got the keys!
And because we also learn from your experiences, your feedback is essential. Let us know your thoughts and suggestions by email: 4x4xpert@euro4x4parts.com
Check out our complete catalogue of 4x4 parts and accessories!
All the photos in our articles are taken on authorized roads or tracks, private land, or during supervised competitions. Let's all do our part to preserve the environment!
Please note: Euro4x4parts publishes this information to help its customers, but cannot be held responsible for the advice given here and their consequences when used.